Using the advanced editor
Read time: 4 minutes
Last edited: Jan 31, 2025
Overview
The advanced editor is a tool for experienced LaunchDarkly members who want to create their own custom roles. You can use it to create custom roles and policies that are more complex and detailed than those supported by the policy builder.
You can copy example roles or templates that assign the same permissions as LaunchDarkly's built-in roles from the topic Example policies and templates. In the advanced editor, you can modify those templates to do exactly what you want.
The advanced editor can cause large permissions changes to sensitive or confidential resources. If you use the advanced editor incorrectly, it is possible to disable your LaunchDarkly project, lock yourself out of your account, or cause other irrevocable changes.
It is critically important that you read all the documentation in the "Custom roles" section thoroughly before you use the advanced editor to create or modify any custom roles.
To learn more, read Custom role concepts.
Create custom role policies with the advanced editor
To access the advanced editor:
- Click the gear icon in the left sidenav to view Organization settings.
- Click Roles in the left sidenav.
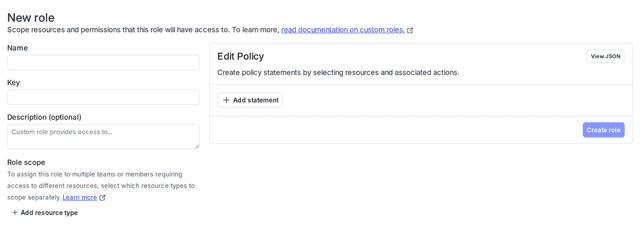
- Click Create role. The New role page appears:

- In the "Edit Policy" panel, click View JSON.
- (Optional) If you do not wish to use the advanced editor, click Policy builder to return to the graphical policy builder. Continue with the procedure Create policies for custom roles.
- Specify the effects, resources, and actions you wish. You can also specify inverse action and resource sets using
notActionsandnotResourcesrespectively. - Click Create role.
Syntax for the advanced editor
When you create a policy with the advanced editor, you use a JSON array to specify the policy. Each element in the policy array is a statement represented as a JSON object with three attributes:
| Attribute name | Description |
|---|---|
effect | allow or deny. |
actions / notActions | A list of action specifiers defining the actions to which the statement applies or does not apply. To review the available action specifiers, read Using actions. |
resources / notResources | A list of resource specifiers defining the resources to which the statement applies or does not apply. To review the available resource specifiers, read About resource types and scopes. |
When you create a policy with the advanced editor, you can specify resources that the role can or cannot access in the following ways:
-
All instances of the resource, for example, all projects:
-
All instances of the resource with a few exceptions, for example, all projects except "Project A":
-
Only specific instances of the resource, for example, "Project A," "Project B," and "Project C":
-
Only specific instances of the resource, where the instances have a particular tag. For example, all projects with the "example" tag:
-
Only specific instances of the resource, where the instance properties match a particular value, for example, all environments that are marked as critical:
In the advanced editor, you must use resource keys, not display names. If you use names, the policies will not take effect. The resource keys are case-sensitive. For example, if the production environment of your default project has the key production, then referencing proj/default:env/Production in your policy will not work.
To learn more, read Resources, role scope, and role attributes and Using roles scope. For advanced policy examples, read Example policies and templates.