Using role scope
Read time: 2 minutes
Last edited: Jan 31, 2025
Overview
This topic explains how to work with role scope for custom roles. Using role scope in a custom role definition means you can assign the same role to many different teams or members, even if the teams and members should have access to different resources.
When you write a custom role, one way that you can specify the resources the role can or cannot access is with a role attribute. A role attribute identifies a resource based on a parameter. You define the role attribute when you create the custom role, and you specify its value when you assign the role to an account member or team. To learn more, read Resources, role scope, and role attributes in the Custom role concepts topic.
If multiple members or teams should have similar permissions, but work with different resources, setting the role scope lets you reuse the same custom role. This means the total number of custom roles in your account is much smaller, and much easier to maintain.
Define role attributes
You define role attributes when you create a custom role policy. Here's how:
- From the "New role" page, find the "Role scope" section:
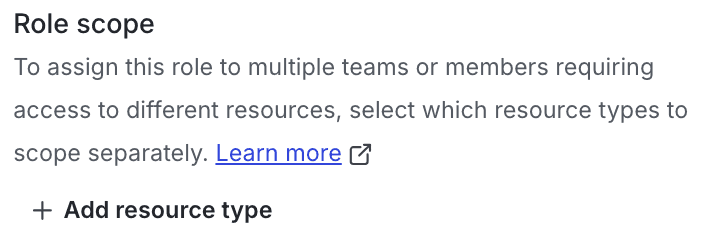
- Click + Add resource type.
- Select a resource type from the menu, for example, "Project."
- At the prompt, enter a key for the role attribute:

The role attribute is a parameter for this custom role:
- You use this key in this custom role's policy statements. To learn how to create custom roles and their policy statements, read Creating custom roles and policies.
- Each time you assign this custom role to a member or team, you enter a value for the role attribute. For example, you can set the value of the role attribute to
projectA(the project key of "Project A") when you assign the custom role to member A, and then set the value of the role attribute toprojectB(the project key of "Project B") when you assign the custom role to member B.
To learn more about creating custom roles, read Creating custom roles and policies.
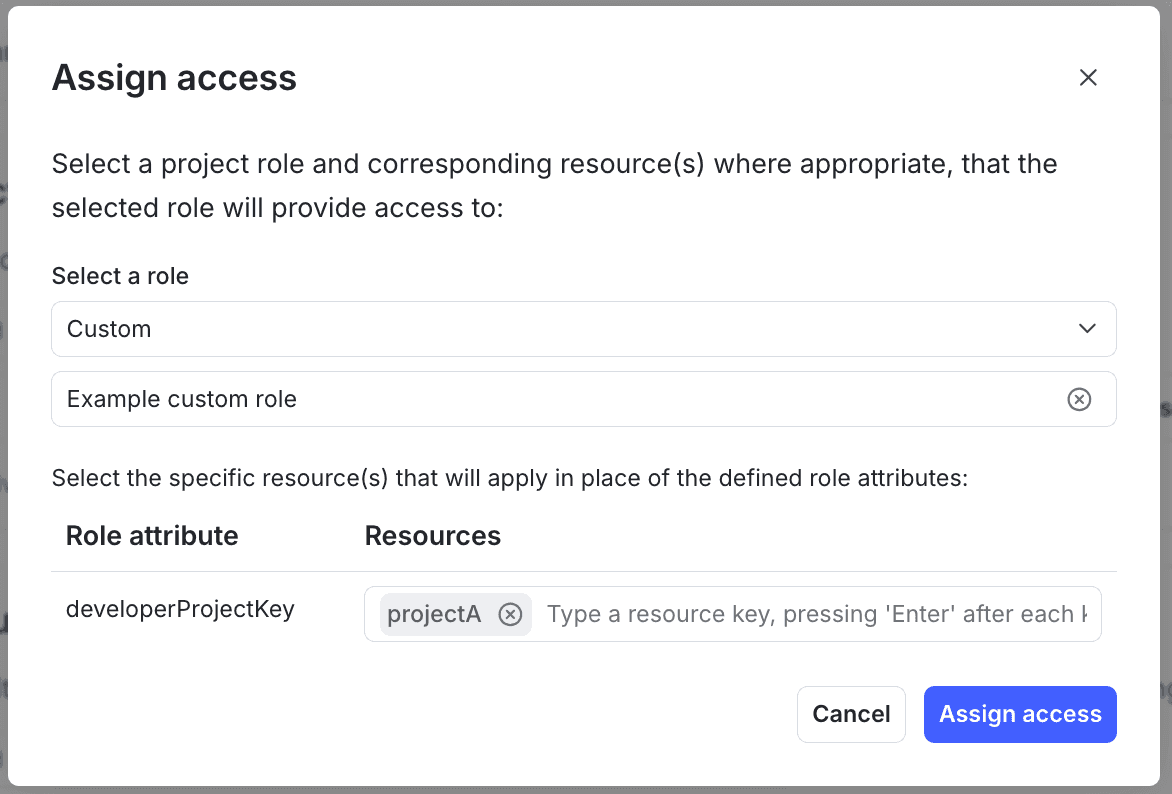
Set role attribute values
You set a role attribute value, or specific resource, when you assign a custom role to an account member or team: In the "Assign access" dialog, enter the values for the role attribute in the Resources field:
To learn more about assigning custom roles to account members, read Adding member roles. To learn more about assigning custom roles to teams, read Managing team permissions.