Data Export
Read time: 4 minutes
Last edited: Jan 22, 2025
Data Export is available as an add-on to select plans. To learn more, read about our pricing. To add Data Export to your plan, contact Sales.
Overview
This topic explains how to use LaunchDarkly's Data Export feature to export and store flag, context, and Experimentation event data.
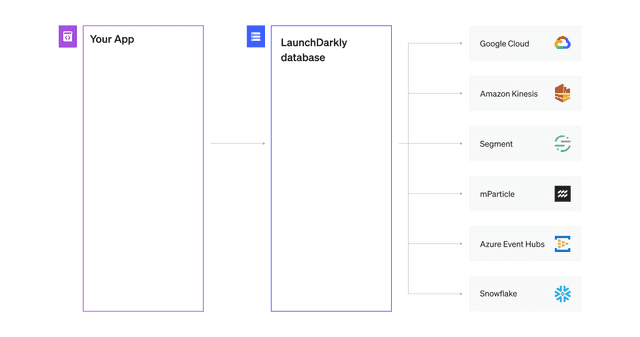
Data Export provides a real-time export of raw analytics data, including feature flag requests, analytics events, custom events, Experimentation events, and more. By exporting your data to a location of your choice, you can use your own data warehouse and tools to analyze event data.

You can also use the REST API: Data Export destinations
How Data Export works
Data Export works by sending data to one of our supported destinations. A destination is an external service which can receive and store the data.
To learn more about event formatting, read Schema reference.
Some Data Export destinations have different event formatting schema. If you use mParticle, Segment, or Snowflake as your event destination, we have specific documentation for their event schema.
Export event data for flags and environments
To use Data Export, all of your SDKs must be configured to send events. If you have disabled sending events for testing purposes, you must re-enable it. To learn more about the events SDKs send to LaunchDarkly, read Analytics events.
After you create a Data Export destination, you can send data to it for individual flags or for all the flags in an environment.
The Data Export feature facilitates live data export and does not backfill historical data. This means that when you activate Data Export, you will begin exporting data only from that point forward.
Export flag event data
To export data from a specific flag to a destination:
- Navigate to the Flags list.
- Click the name of the flag you wish to export data from.
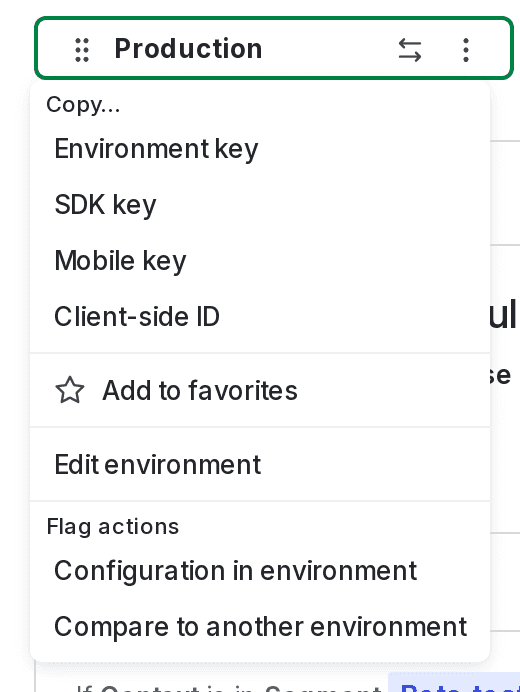
- Click the three-dot overflow menu for the environment you want.

- Select Configuration in environment. The "Environment configuration" screen appears.
- Select the Send detailed events to data export destinations checkbox.
- Click Save setting.

If you have enabled exporting detailed event data at the environment level, the Send detailed events to data export destinations checkbox will be checked by default for all new flags. However, checking the box at the environment level does not override existing flag settings. To learn more, read Export environment event data.
About Data Export and Experimentation events
If you check a flag's Send detailed events to data export destinations checkbox, then LaunchDarkly exports evaluation events for all contexts that encounter the flag.
If you do not check the Send detailed events to data export destinations checkbox, then LaunchDarkly does not export evaluation events, unless you are using the flag in an experiment. If you are using the flag in an experiment, then LaunchDarkly will still export evaluation events for contexts included in the experiment, but no other contexts.
You can tell if an evaluation was part of an experiment from the optional inExperiment attribute. Evaluations that were part of an experiment have the inExperiment attribute on the evaluation reason set to true. To learn more, read Evaluation reasons.
Export environment event data
To export data from all flags within an environment to a destination:
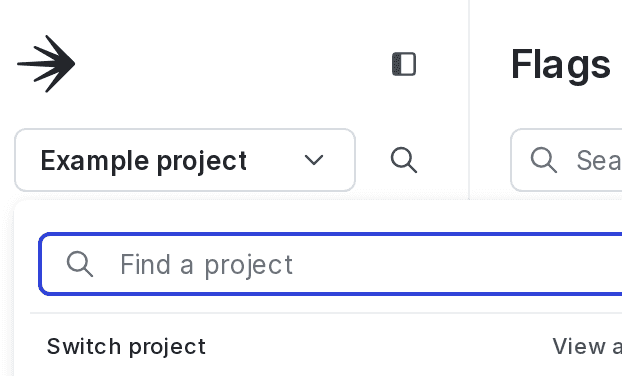
- Click the project dropdown. The project menu appears:

- Select Project settings.
- Select Environments. The Environments list appears.
- Click on the overflow menu next to the environment you wish to export data from.
- Choose Edit environment. The "Edit environment" panel appears.
- Select the Send detailed events to data export destinations checkbox.
- Click Save environment.
If you have the Send detailed events to data export destinations checkbox checked at the environment level, the flag-level Send detailed events to data export destinations box will be checked by default for new flags. You can uncheck the box at the flag level to override the environment-level setting.
Delivery guarantees
After your application has successfully sent an event to our servers, we will send the event to your configured destinations at least once.
An event is sent to your destinations exactly once, with some exceptions. In the event of a hardware failure or networking issue, we may send events multiple times.
Additionally, if your configured destination does not acknowledge receipt of the event, we will retry sending the message five times over a 30 minute period.